As we were driving home, sleeping kiddos in the back in their car seats, I let my mind wander a bit about that dress and how it was constructed, and I wondered if I could copy that dress using fabric that I had on hand. So I decided to give it a try, and it worked remarkably well for me. Here's how I did it:
...And I traced the front. I did not include any seam allowances.
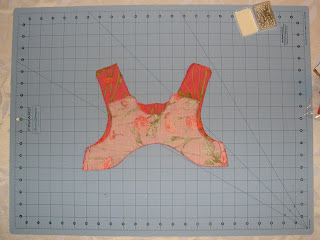
Next, I used two fat quarters and tried to see if I could fit the pieces all together.
If you look closely, you'll see that I cheated a little. Instead of cutting the back yoke on the fold, because of its awkward shape, I cut two and decided I could live with a seam down the center back. You'll also notice that I added in my seam allowances.
Next, since I don't own a serger, I zigzagged around all the pieces.
I then sewed the back and the front together along the side seams and pressed the seams open.
And after sewing the two back yoke pieces together, I sewed the front yoke and back yoke together along the side seams as well.
Next, I turned the dress right side out and sewed the yoke and the dress together. To keep the yoke from riding up once the dress is worn, I stitched in the ditch along the side seams to connect the yoke to the dress.
I then cut notches along all the curves that would be turned out.
Be sure you don't cut all the way to the seam!
Once the notches were cut, I turned the dress right side out and ironed the seams. Then came some new learning for me: after owning my sewing machine for nearly 20 years, I finally taught myself to use the automatic button hole attachments. What a dream!
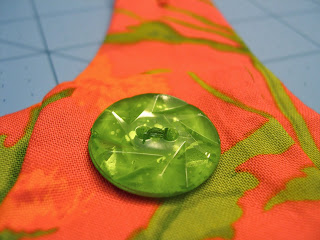
And I sewed the buttons on.
And once I hemmed the dress, it was done.
I have to say, this project was a real confidence booster for me for a few reasons. First, I used attachments on my machine that I've somehow managed to put off and put off for decades(!). Second, it taught me that I can make something a little more involved and create my own pattern. I think I may copy a few of my older daughter's dresses, including one that has some sweet pleats. Again, it has a very simple shape, and a good challenge. I bet I can do it.
First, I turned the original dress inside out and traced it. I traced the back...
...And I traced the front. I did not include any seam allowances.
Next, I used two fat quarters and tried to see if I could fit the pieces all together.
If you look closely, you'll see that I cheated a little. Instead of cutting the back yoke on the fold, because of its awkward shape, I cut two and decided I could live with a seam down the center back. You'll also notice that I added in my seam allowances.
Next, since I don't own a serger, I zigzagged around all the pieces.
I then sewed the back and the front together along the side seams and pressed the seams open.
And after sewing the two back yoke pieces together, I sewed the front yoke and back yoke together along the side seams as well.
Next, I turned the dress right side out and sewed the yoke and the dress together. To keep the yoke from riding up once the dress is worn, I stitched in the ditch along the side seams to connect the yoke to the dress.
I then cut notches along all the curves that would be turned out.
Be sure you don't cut all the way to the seam!
Once the notches were cut, I turned the dress right side out and ironed the seams. Then came some new learning for me: after owning my sewing machine for nearly 20 years, I finally taught myself to use the automatic button hole attachments. What a dream!
And I sewed the buttons on.
And once I hemmed the dress, it was done.
I have to say, this project was a real confidence booster for me for a few reasons. First, I used attachments on my machine that I've somehow managed to put off and put off for decades(!). Second, it taught me that I can make something a little more involved and create my own pattern. I think I may copy a few of my older daughter's dresses, including one that has some sweet pleats. Again, it has a very simple shape, and a good challenge. I bet I can do it.
I can't wait to see it on her!


No comments:
Post a Comment